
Know your troops and your enemies troops
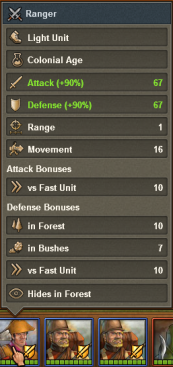
Image 1
Know the fighting unit(s) you are using. Hover the mouse over the bar at the bottom of the battle screen,

the one that displays your troops and the enemy troops. When you do, you will see the stats for that fighter, shown here on the left. We will cover this stats display in detail. For the moment, take note of the Attack Bonuses section about halfway down the image. This fighter is a Ranger and gets an additional 10 attack units when he attacks a Fast Enemy Unit. You can determine the enemy’s unit type by hovering over an enemy troop on the troop bar and looking at the 2nd line from the top. Note that for this Ranger shows Light Unit on the unit type line. Look at Defense Bonus line. This fighting unit gets an additional 7 defense points if he is in the bushes when he is attacked and an additional 10 if he is in the forrest. Also note that this unit Hides in Forest. Meaning he cannot be seen and targeted by any enemy that can attack from a distance say riflemen or cannons and the like (with 1 exception that I know about, but I digress here).
Also please notice the attack and defense bonuses in green towards the top of the stats window. This will tell you the military boost this unit has. As a matter of fact, this is the military boost for the entire army (attacking or defending). It is a good idea, to check the stats for each of your enemies troops. See what their military boost is and where they get additional attack and/or defense help. I have heard FOE players say “Stick to the trees, you attack harder!” That is the case with the Ranger we looked at earlier. However, the archer gains attack strength when he is on rocky ground. Many cannons gain attack strength when on hilly areas. A Progressive age soldier gains defense strength when he is in a trench for fox hole. So it is not the same for every type military unit. Take a little time to know where the best places are for your soldiers on the battlefield, as well as those areas, you want to keep your enemy from.
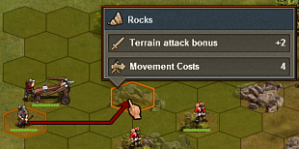 Image 2
Hit the enemy first (if you can)
There will come a time in battle when you can strike your enemy and they can strike you. Sometimes this occurs almost at the onset of battle. Ballistas, rapid fire cannons, and some modern era mechanized vehicles can attack almost across the entire battle field. If you are within range of several of the enemies troops, it makes more sense to attack the one who can fire next as opposed to attacking the one closest (who just fired at you and is now the last one in the firing order).
How can you determine which of the enemies troops will fire next? That is easy. Again go to the bar at the bottom of the screen that displays all the troops.
 Image 3
The round area to the very left, displays the current unit that will be firing. This will be yout unit, since we are trying to figure out who to attack. The units to the right in the square bins, are the units (yours and the enemy) in the order that they will fire/attack. Neat huh? You are probably asking, how can I tell from the square at the bottom, which fighter it represents, which hexagon square on the battle field does it point to? The answer is easy. Hover your mouse over the square and that fighters hexagon will turn orange.
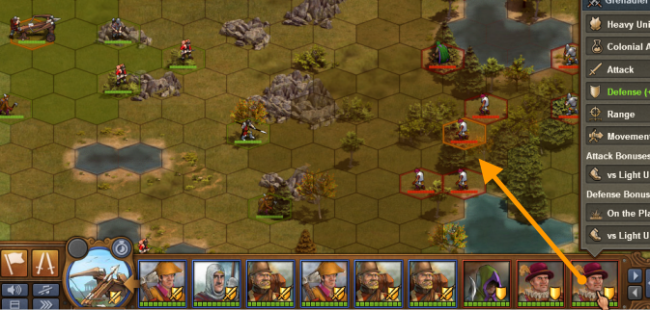
Image 4
So if you find the leftmost enemy, the one who will be firing next for the enemy, hit them first. Then when they attack you, they are doing so with a weakened unit and your unit will sustain less damage. Of course, you have to use this strategy with some common sense. If a closer unit is about to take out or damage a key unit you have, naturally deal with that unit first.
For those of you in the Guild vs. Guild wars, fighting in the iron age against ballistas, this approach works great for ballista against ballista. I personally, will sacrifice an archer or two if they can strike at a ballista. My ballistas then have the advantage as long as i keep weakening theirs before they can attack.
Stay Enthusiastic 
Keeping your city enthusiastic (instead of just happy), gets you extra points when you win a battle.
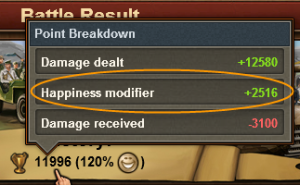 Image 5
See the happiness modifier in the graphic above? Those extra points can add up fast.

Fighting Against Rogues
I have seen a few different ways players use Rogues to defend. One is to have 1 or 2 of your powerful troops accompanied by 6-7 rogues. This is actually pretty easy to defeat, depending on the “powerful troops” they have deployed. Rogues will change into one of the other troop types when they are first struck. We all should know that. If you can easily defeat the “powerful troops” your enemy has placed with the rogues, then take the rogues out first, or close to first and fight on as you normally would. For example, and I will use an Iron Age example here, there are 6 ballistas and 2 rogues you are up against. You have checked your enemy’s defense boost and attack boost and determined that you have sufficient power to sustain some damage from ballistas – qty 8, and plenty of attack power to wipe out 8 ballistas. In this case take out the rogues when you can and before they can get close enough to strike you. Finish off all the remaining ballistas — piece of cake.
In this next example, the scenario is reversed. Your enemy has 7 rogues and 1 ballista. In my opinion this is a silly defense (except in the higher eras like Post Modern and Contemporary), but you run into it or some variation of it often. The trick here is to avoid the rogues until you can take out the ballista. Once the single powerful unit is gone, the rogues disappear on the first hit. Keep an eye on the rogue locations. As with any troop, defending and attacking, you can see their area of movement on the map.
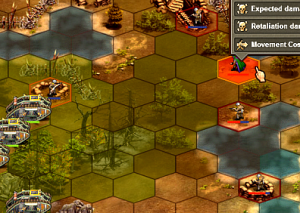 Image 7
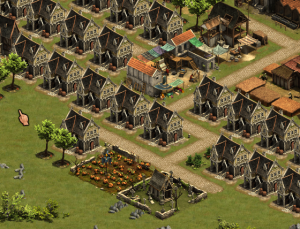
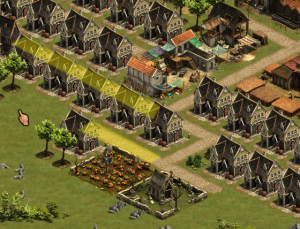
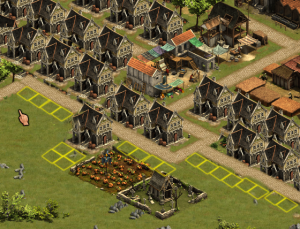
Hover your mouse over one of their rogues (or any unit for that matter). You will see in a darker green or brown (depending on the ground your battlefield is on) the area that this unit can move to on their next move. Just keep your units at least 2 hexagons away from the rogue(s) and you can destroy the power unit(s) and then take out the rogue. You will most likely take some damage, but you will win the battle if you master this technique. If you must allow one of your units to take a hit from a rogue, try to make it one which will either die a a result of the rogue attack or one that does not strike back during close quarter attacks (like the Iron Age archer or the Colonial Age Musketeer).
Fighting With Rogues
Fighting with 1 or 2 rogues can be useful. The Forge Of Empires artificial intelligence (AI) defense program has one very noticeable flaw in it. It will direct defending troops to go after any rogues within range first. I often times use that to my advantage and place a rogue or two as “bait”, drawing out troops such as snipers, rapid fire cannons, musketeers etc. I can draw them closer and often times out of area where they get a defense boost. For example I can draw out a sniper from the trees, where he gets a maximum defense boost, into an unprotected area. How do you calculate the placement of a “bait” rogue? In the image above (Image 7) we learned that the game will show us the areas within which, that particular unit can move. Notice Image 1 at the top of the page. The 6th line down is called Range. This is important information for you to know to “bait” the enemy into the range of your troops. Let’s say you had 3 archers or 3 musketeers and you wanted to bait an enemy cannon into a spot to clobber it. Check the movement zone the archer or musketeer can move within, from each of the outermost hexagons add the Range value by counting the hexagons directly toward the enemy. If I can get the cannon or tank, or enemy ballista etc. within the range of 2 or 3 or more of my attacking armies units, I will place the rogue at that vital most hexagon. Hoping the defensive AI program will move the cannon there to take care of the rogue. Then I will hit it with every attacking unit I can.
It is difficult to do a graphic here, I hope at least some of you readers are getting what I am trying to communicate here. Feel free to leave a comment with your description of this strategy. By the way, this ploy works great when someone has a unit or two from the next age/era on the defending army and my army is at the same “earlier” age as the majority of their troops. Lure the more advanced units into a rogue bait trap — then pounce on that more advanced unit. If you don’t kill it, you would have seriously weakened it.
Dieing With Maximum Damage
If you have a unit that is about to die, one with 1 or 2 health squares left, why not make as big a hit on the enemy as you possible can? I am going to use examples from the Iron Age and Progressive Era here. I am certain you can translate the logic here into troops in other ages.
Each age has long range units. The units that can strike at you from a great distance away. The ballistas in the Iron Age for example and the Rapid Fire Cannons in the Progressive Era are good examples. Each age also has good sturdy troops that can withstand some major damage and still travel, sometime, across the entire battlefield, although they may be very weak when they get there. The iron Age units I will use here is the Legionnaire and the Ballista. Replace Legionnaire with Conscript and Ballista with Rapid Fire Cannon for the Progressive Era equivalent scenario.
I have 3 Legionnaires and 5 Ballistas in battle against the enemies 4 Ballistas, 2 Archers and 2 Soldiers. I have used the technique described earlier of bombarding their ballistas with mine to lower their strength. By the way, I took out their archers first, so my ballistas have sustained some damage from theirs. My Legionnaire that lead off first is about 3/4th across the battle field with half health. He gets hit by a one of their Ballistas followed by a second hit by an enemy Soldier. My Legionnaire is down to 2 health units and he is within reach of one of their Ballistas. Do I take that Legionnaire and immediately strike the soldier back? Me, myself, I do not. I advance the Legionnaire forward to the ballista within range and strike at it, taking 2-3 of it’s health as I do. Why? My Legionnaire is weakened. His hit to the soldier that struck him last will probably result in the soldier losing 1 health unit. Ballistas are extremely weak in close quarter fighting. I can reduce the enemy’s entire health more by striking the Ballista. My Legionnaire will die the next time he is hit, but he would have made a maximum damaging impact on the state of the entire enemy. Often times, a tactic like this is the difference between winning or losing a battle.
Great Buildings Military Boost
Add military boost Great Building for awesome fighting power! Forge of Empires has these super buildings called Great Buildings that yield special bonuses / rewards such as extra forge points, increased gold coin and/or goods production, extra happiness and yes additional military strength. With the advent of GvG wars, I have noticed some players are confused about the Great Buildings for military boost. Here is a quick synopsis as to which Great Buildings to go after and how they can assist you in your PvP efforts as well as benefit your guild in the GvG wars.
Statue of Zeus (Bronze Age)
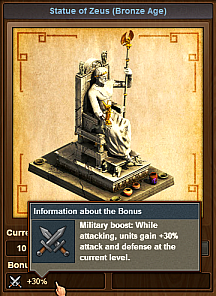
Obtain blueprints by motivating/polishing bronze age structures.
Collect all 9 blueprints.
At level 10 (currently the maximum) you gain a 30% boost for your attacking army in both attack and defense. Put another way having your Zeus Statue at level 10 is like having 2-1/2 more fighting units when you attack a city in PvP. For those of you who play in the neighborhood PvP tournament battles or the GvG wars, this is like attacking a neighbor (or a sector) with 12-1/2 units with them having only 8 units to defend their city/sector. Zeus (at level 10) also allows you withstand more hits from the enemy. Think of it like this. You have Zeus (at any level, but I will give level 10 examples here), and you hit your enemy’s Great Sword Warrior with a Great Sword Warrior (GSW) of your own. Assume your enemy has no military defense Great Buildings for the purpose of this example. Your enemy’s GSW drops 5 health points. Now the enemy GSW strikes your GSW back and your GSW only dops 2 health points. For those of you reading this that are PvP players, who wouldn’t like those odds? For those PvP players who like to plunder, this means more players in your neighborhood become your personal plunder victims. For those of you who battle in the GvG wars, this translates into stronger Siege Armies when you are attacking a sector – who wouldn’t like that?
I have noticed that many players will make the effort to obtain a Zeus Statue, take it to a level 4 or 5 and then get another military boost Great Building. One of the other 2 listed below. Then build that one up to a level 4 or 5, and so on. The reason I am guessing, that people do this is because the lower levels take less Forge Points than the higher levels. So it seems like an easier path to take to increase your military boost. All of my military Great Buildings are at level 10, each and every one of them. I am here to tell you that I can battle enemies that are 1, 2 and sometimes 3 tech ages higher than my chosen army and win, depending on what military boost Great Building they have. If you fancy yourself a FOE warrior, take the time and the Forge Points to get this Zeus Statue and the other 4 Great Building I list below, to the maximum level, and you will become UNSTOPPABLE. Ask your guild and your friends for help. Help them in return.
For those of you who really don’t want to fight and are tired of getting plundered all the time, pay special attention to the Cathedral of St. Basil and the Castle Deal Great Buildings I mention below. They are your solution to you being plundered less, in many cases over 50% less.
If you are unclear as to how to obtain these Great Buildings, there are many online resources explaining how to accomplish this. Here are a few, I am certain you can search for others.
Aachen Cathedral (Early Middle Ages)
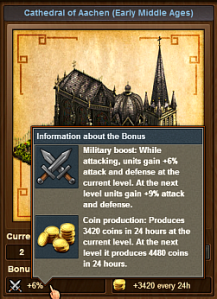
The Aachen Cathedral, also called the Imperial Cathedral, was commissioned by Charlemagne and marked Aachen as the center of his empire.
Obtain blueprints by motivating/polishing Early Middle Age items. The more you motivate/polish the better your chances of getting a blueprint piece. Be patient, don’t give up.
Collect all 9 blueprints.
At level 10 (currently the maximum) you gain a 30% boost for your attacking army in both attack and defense. Combine this with a Zeus Statue at level 10 and its is like having 5 more fighting units when you attack. Think of it, you attacking with the equivalent of 13 units while your enemy only has 8.
How do you like dem apples — huh?
Are you starting to see why I stated earlier with the Zeus Statue description, that you should take the time and FPs to get all your military Great Buildings to level 10. 13 units to 5. Wait until you read below about Castel del Monte.
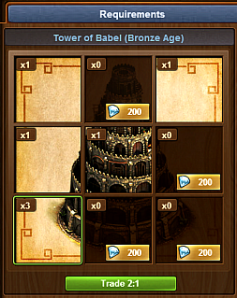
Be patient when collecting Blueprints for your Great Buildings. It is likely you will get duplicates at times. If you get 3 of the same blueprint tile, you may trade in 2 of them for another tile. You do not get to specify which new tile you get. It is a random selection and it is possible, your new tile will be a duplicate for one of the other tiles you already have.
Castel del Monte (Late Middle Ages)
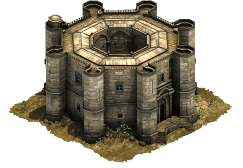 Obtain blueprints by motivating/polishing Late Middle Age structures.
Collect all 9 blueprints.
At level 10 (currently the maximum) you gain a 30%
Castel del Monte (Castel of the Mount) was build by the Roman Emperor Frederick II of Hoenstaufen in the 13th century, in the southeast region of Italy.
The Castel del Monte gives both attack and defense bonus for attacking army and produces some forge points every 24 hours.

A photo of the real Castel del Monte.
All of the Great Buildings, their military boosts at different levels and the goods required to build them may be found at: http://forgeofempires.wikia.com/wiki/Category:Great_Buildings
More to come later
Your comments/replies are encouraged and most welcome.
If you are an F.O.E. player, you might want to bookmark this page for future reference.

 Rogues are a unique fighting unit. You can only train Rogue units if you have the coveted Rogue hideout (shown on the right), available only through Inno contest and special events.




 Obtain blueprints by motivating/polishing Late Middle Age structures.